Coaches, in the years that I have been a strength coach, I have seen many freshmen come into fall camp with high hopes of impressing the coaches with their testing, only to find themselves mildly disillusioned and stating, “Back at home I squatted over 500lbs”. The problem is that they were never taught how to squat correctly. So to help you out, I have put together some ideas and suggestions on how to start all of your athletes out in the squat. Before that though, I must first make the following statements:
- Squatting correctly will NOT hurt your knees. Quite the contrary is true. If you are using proper technique, the knee joint as an entirety will become more stable and have a better resistance to injury.
- If you want to develop one tough athlete, have them squat. Very few things are more difficult than having to crawl under a big squat, get deep with it, and come back up. One of my colleges calls it “Feelin’ the Thunder.” Do a few of these and you will know what that means.
- Squatting is a great base to develop many other movements of greater technical difficulty.
Now the following is what we have found to be a great way to start any age or gender on the squat.
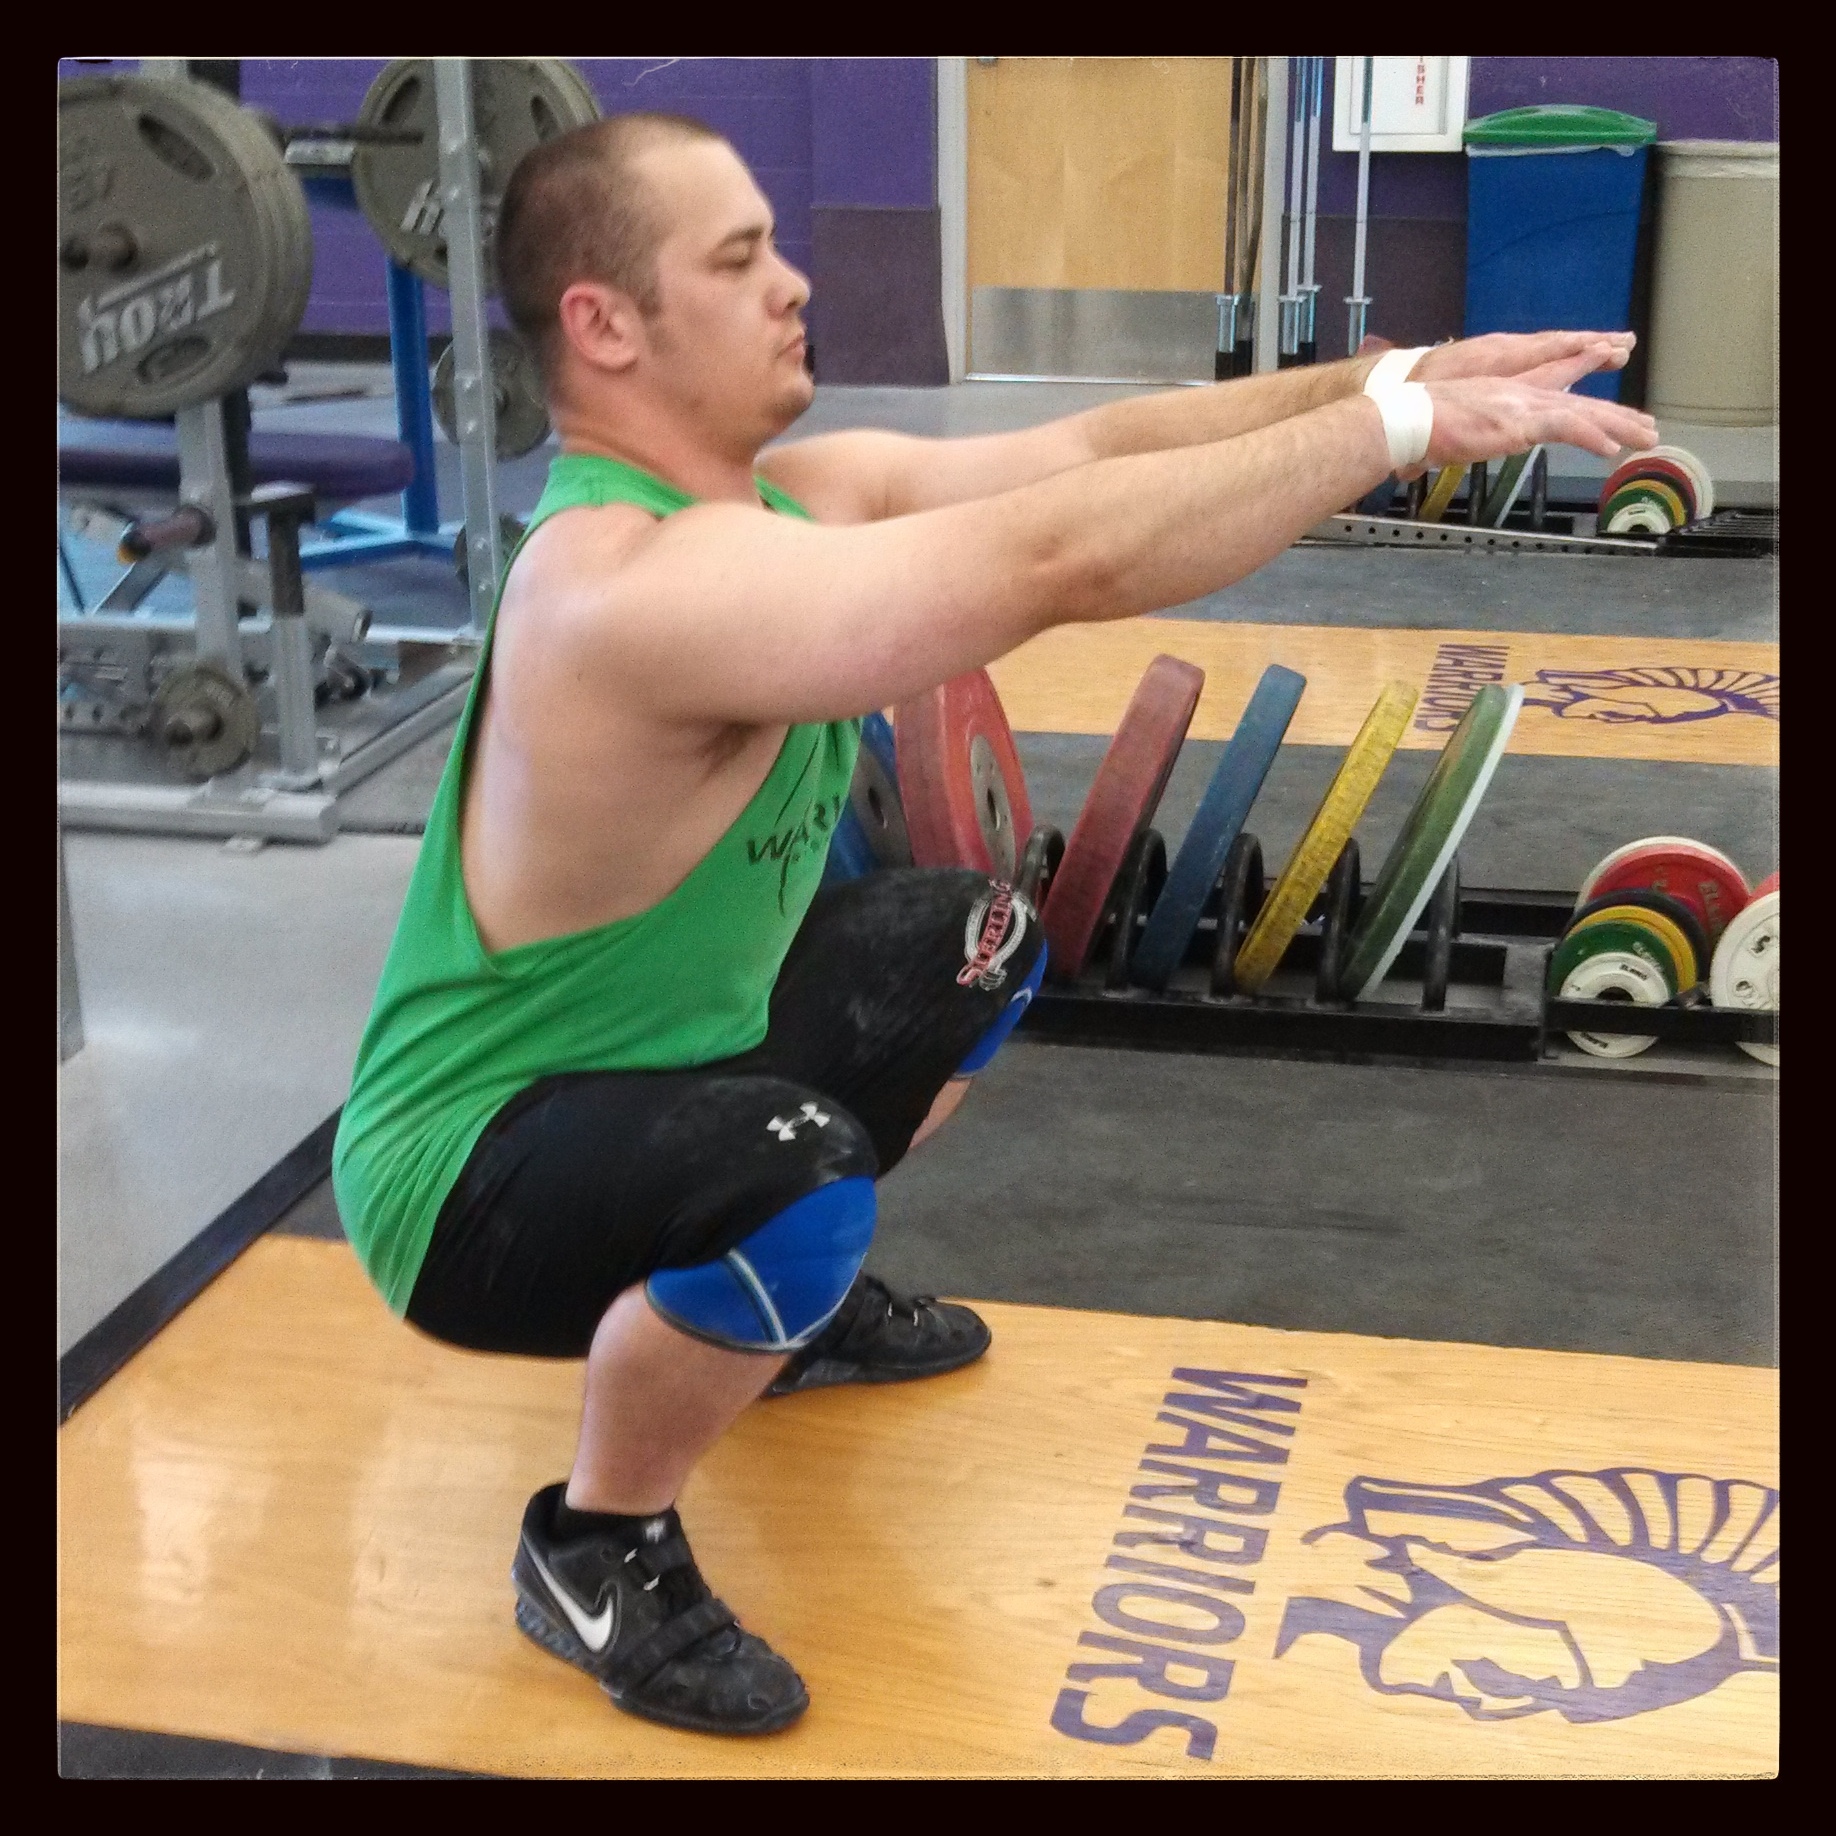
Step #1: Body-weight Squat
- We have the person stand with their feet about shoulder width apart, (each person will vary slightly to find their comfort zone)
 Stand up tall, shoulders back a bit, big chest.
- Eyes and chin up at about 45 degrees. Where the eyes go, so do the shoulders and back. By looking up, we want to keep the back in a good position.
- Arms straight out (this is for counter-balance when doing body weight squats)
- Just before descending take a DEEP breath and hold. If you have a belt on push out against the belt. By doing this, thoracic pressure keeps the back in a proper position.
- The first movement that you want to make as you descend, is to sit your hips back, similar to sitting into a chair. Too many people, especially beginners, tend to have their knees to travel forward. This puts the weight on the toes bringing the heels off the ground. It also causes undo pressure on the knees. Again hips back weight on your heels.
- At the bottom, keep chest high and get deep. And I mean get DEEP! Beyond what most of you call parallel at the thighs. I mean butt to the floor deep. My rationale is that you want the athlete to be strong through the entire range of motion. I know many of you say that when you jump or come out of your stance you don’t get that deep, but on any field of play you find yourself in awkward positions. This is when many injuries occur. Let’s give the athletes the opportunity to be strong in any situation.
- As you come up, keep your eyes and chest up, and exhale your air when you are about ¾ of the way up.
You have now completed one squat, congratulations! From here there should be many more to come. Once you have spent a few days, or even weeks on getting the athlete to be able to squat with GREAT TECHNIQUE using their body weight, it is time to move to the next stage.
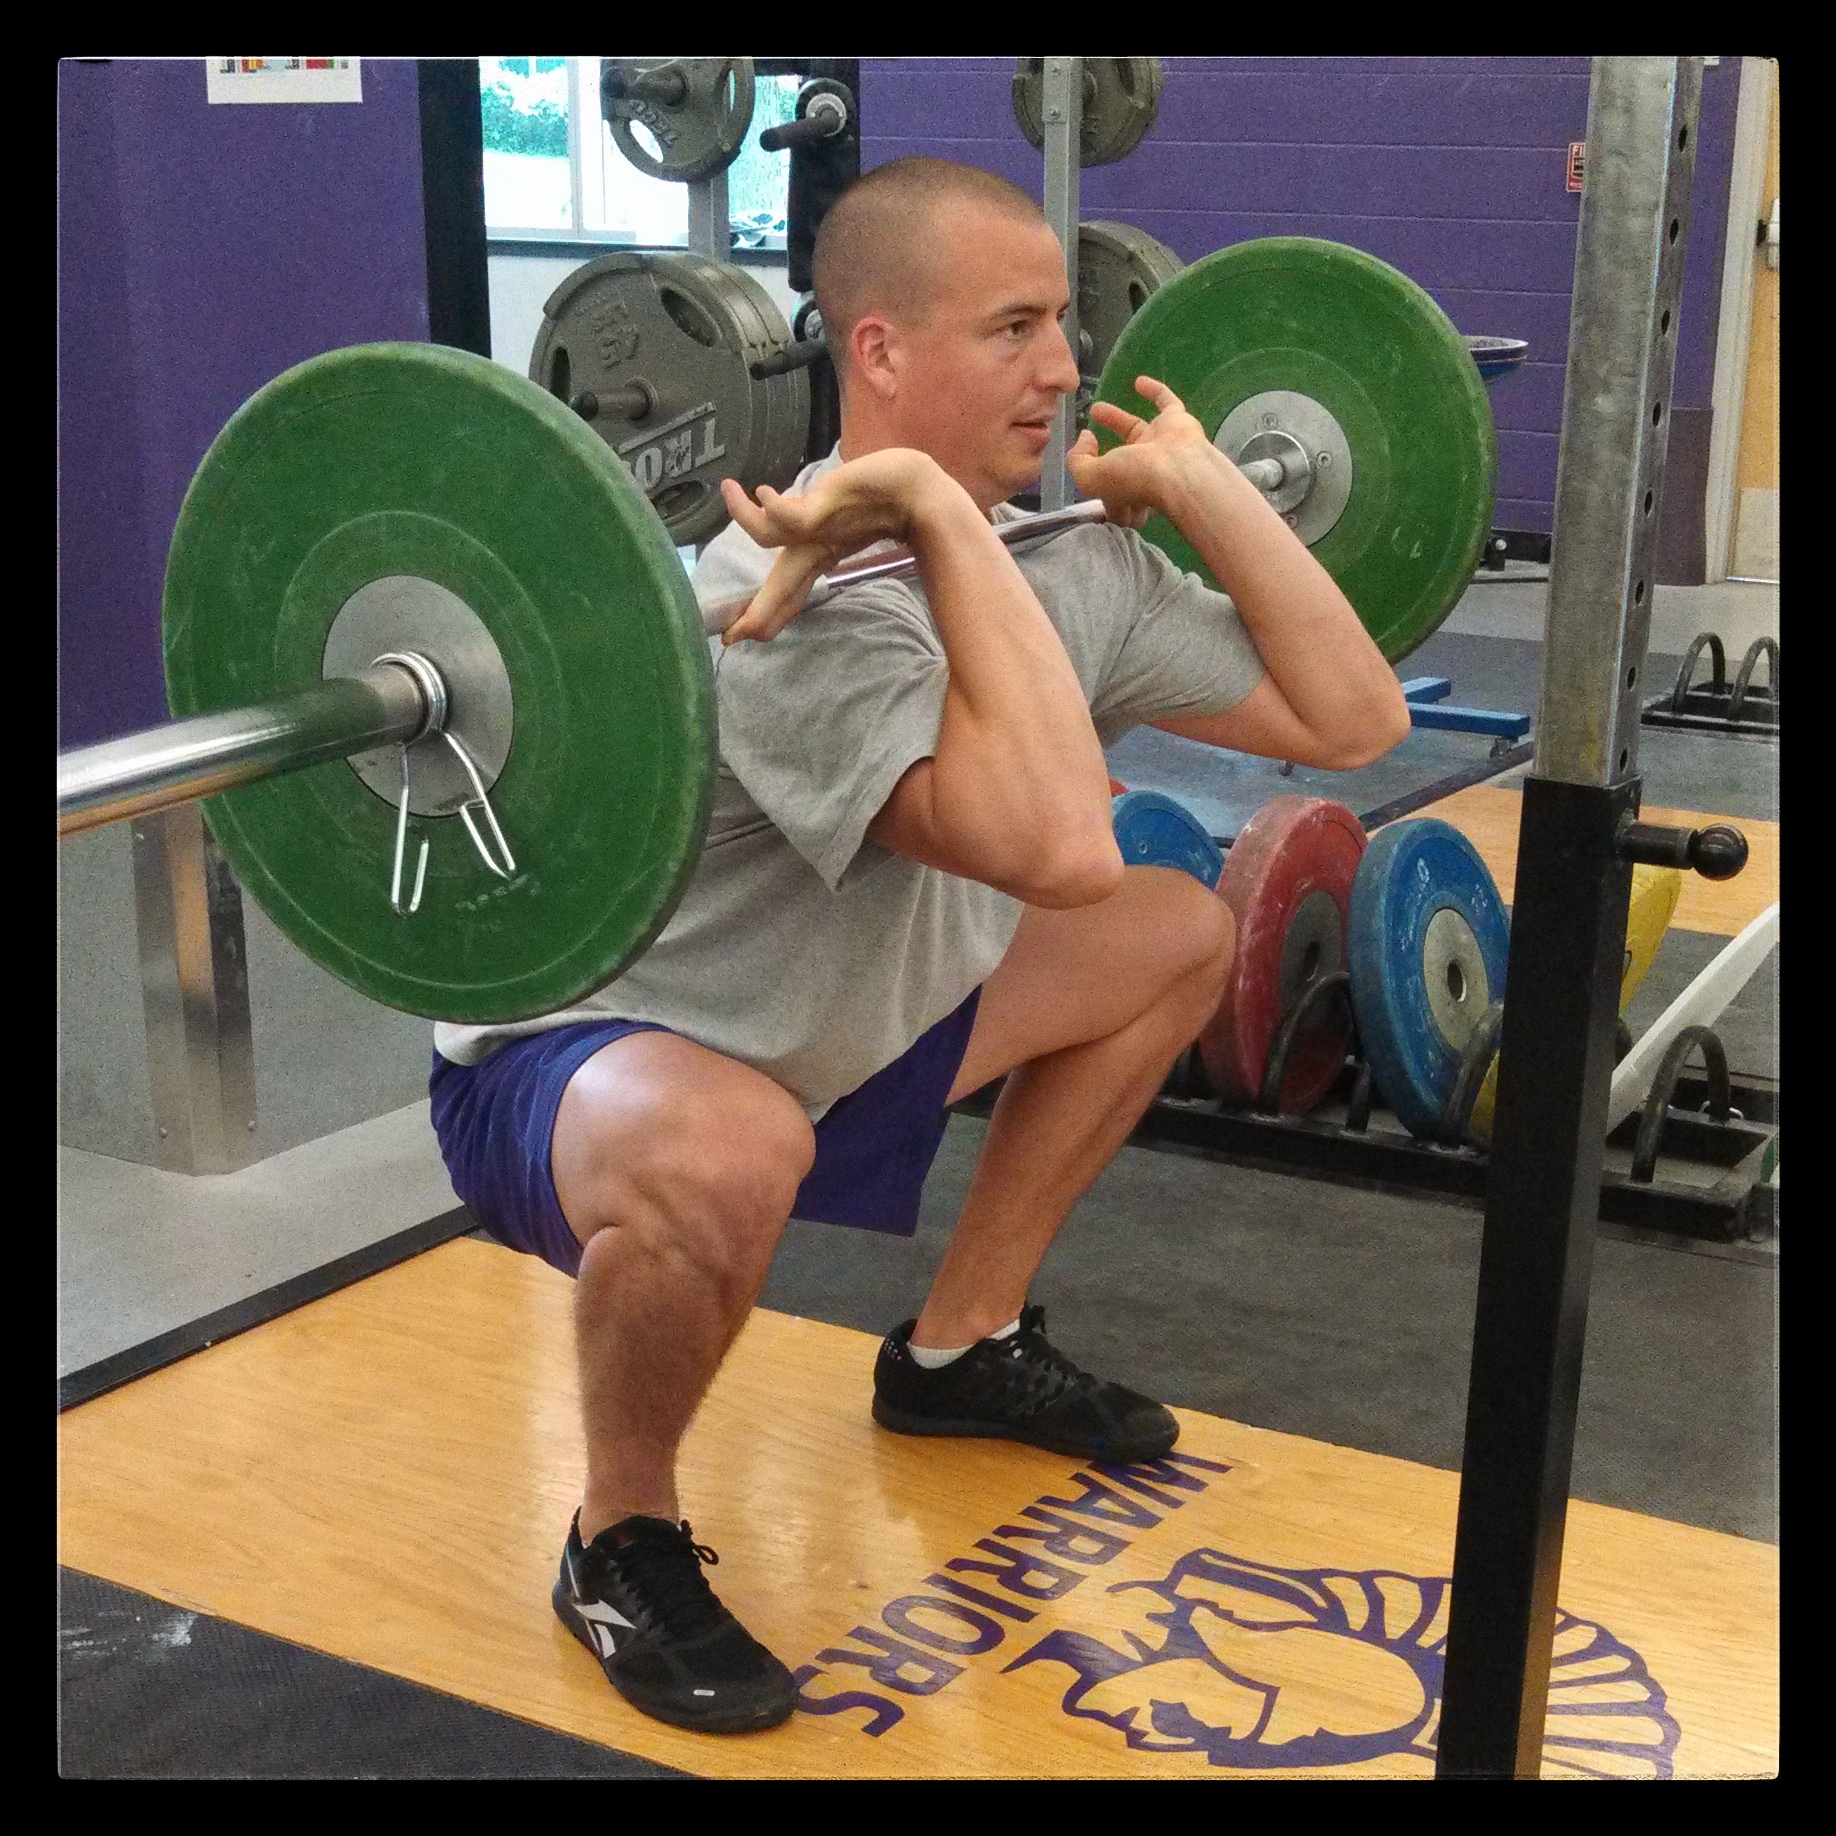
Step #2: Front Squats
The reason I like front squats over going directly to back squats is that you are able to place your athlete into a better technical position. When starting on the front squat one of the highest priorities is hand placement. It is crucial that you have your athletes use a CLEAN GRIP. Yes, I know that at first this may be a bit difficult and your wrist may be a bit sore, but deal with it. Most athletic  endeavors have some kind of difficulty to them. This is one of those things. With a clean grip the back must maintain a straighter position or the bar will be dropped.
A couple hints on how to do the clean grip correctly. Open the hand so that there are just a few fingers on the bar, rather than gripping it tight. The bar must be supported with the front deltoids, NOT by your hands. The hands should therefore be placed just outside the delts, wider than shoulder width, and not directly in line with the front deltoids. The athlete should also focus on keeping their elbows high, pointing them straight ahead and not dropping them down by their side. Now after several weeks of mastering these first steps in front squatting, only then do I move to the back squat. The transfer from a front to a back squat is easy now. A “high bar position” for the back squat seems to work out best. A few clean-up items:
- Regardless of what you read online or in some magazines, please do not do your athletes the injustice of having them squat to a box or any other range limiting item. Let them develop strength and confidence through the entire range of motion.
- Do not let anyone convince you that a towel or a piece of plastic is needed to hold the bar in place on their backs. In a high bar position the bar should be placed on the rear deltoids NOT on the cervical vertebra.
Lastly, your athletes will thank you in the end because you have properly prepared them to improve in all mental and physical aspects as an athlete. As coaches you will enjoy an athlete who is stronger, quicker, more explosive, and mentally tougher than his/her opponents and aint that a nice thing!
– Jeff Reinardy, StrengthPro.net